Showing posts with label crafts. Show all posts

Friday, March 7, 2014

Queso Chicken

This is the ULTIMATE comfort food recipe. Have you ever combined two really great things to make an even greater thing? Chicken fried chicken and a really good queso blanco, two staples from my childhood in Texas begging to be united. 

Look close, closer, do you see its gooey cheesy goodness covering all that awesome chicken crispiness? It's as delicious as it looks and simple to make, in fact, you may already have the ingredients at home.

This recipe makes a slightly larger then necessary batch of queso so that you can have it as a side for tortilla chips, or vegetables. 

April

Queso Chicken
 
Ingredients for the chicken:
  • 1 cup all-purpose flour
  • 1 tsp seasoned salt 
  • 4 boneless skinless chicken breast halves
  • 1 cup of milk
  • 1/4 cup Canola oil
 Ingredients for the Queso Blanco:

  • 1 cup Monterey Jack cheese 
  • 1/4 cup salsa
  • 1/4 cup half-and-half
  • 1/2 tsp minced garlic
  •  1/2 teaspoon salt
Directions:
Heat oil in a large skillet over medium heat. In one bowl, combine flour and seasoned salt. Pour milk into another bowl. Using tongs, dip chicken breasts first in milk, then in flour coating both sides of the chicken breast, shake off excess flour. Add the chicken to the skillet. Repeat with each breast, being careful not to crowd the pan.

Cook chicken breasts for approximately 10 minutes on each side or until chicken is no longer pink in the center and juices run clear.  Once done, drain breasts on a plate covered with paper towels. 


Put all queso ingredients into a double boiler and turn heat to medium. Cook until melted and well blended, stirring with a wooden spoon. 


Place chicken on individual plates and smother with queso.

Thursday, March 6, 2014

French Bistro Tomato Cream Soup

My memories of France, the Loire Valley in particular, encompass lazy weekends, warm sunshine, trying out  my very poor French on the locals and wondering if opening  a bottle of wine at 10 am was acceptable (it was!) There’s nothing more enjoyable than eating lunch outside while watching the world go by. And this creamy tomato soup, served with warm crusty bread always makes me feel like I am back at my favorite bistro in France.

I hope you enjoy it as much as I do! ~ Wendy


French Bistro Tomato Cream Soup

4 Servings

Ingredients:
2 Tablespoons unsalted butter
1/2 cup diced onion 
1-28oz can of diced tomatoes
1 cup of good quality chicken stock
1 cup of half and half
*optional 1 tbsp of fresh chopped basil leaves for a creamy tomato basil soup

Melt butter in a 3 quart heavy bottomed saucepan over medium heat. Add onions and saute for 2 minutes, until tender. Add tomatoes, chicken stock, half and half, and also the fresh basil if using. Bring to a boil, reduce heat and simmer for 5 minutes. Remove from heat. Using an immersion/stick blender, blend soup until smooth. Serve with crusty bread


Friday, February 28, 2014

Out and About in Our Town


The gazebo on the village green.
So nice to sit in its shade on a hot, sunny day
 
The bark of the old willow tree
outside my front window
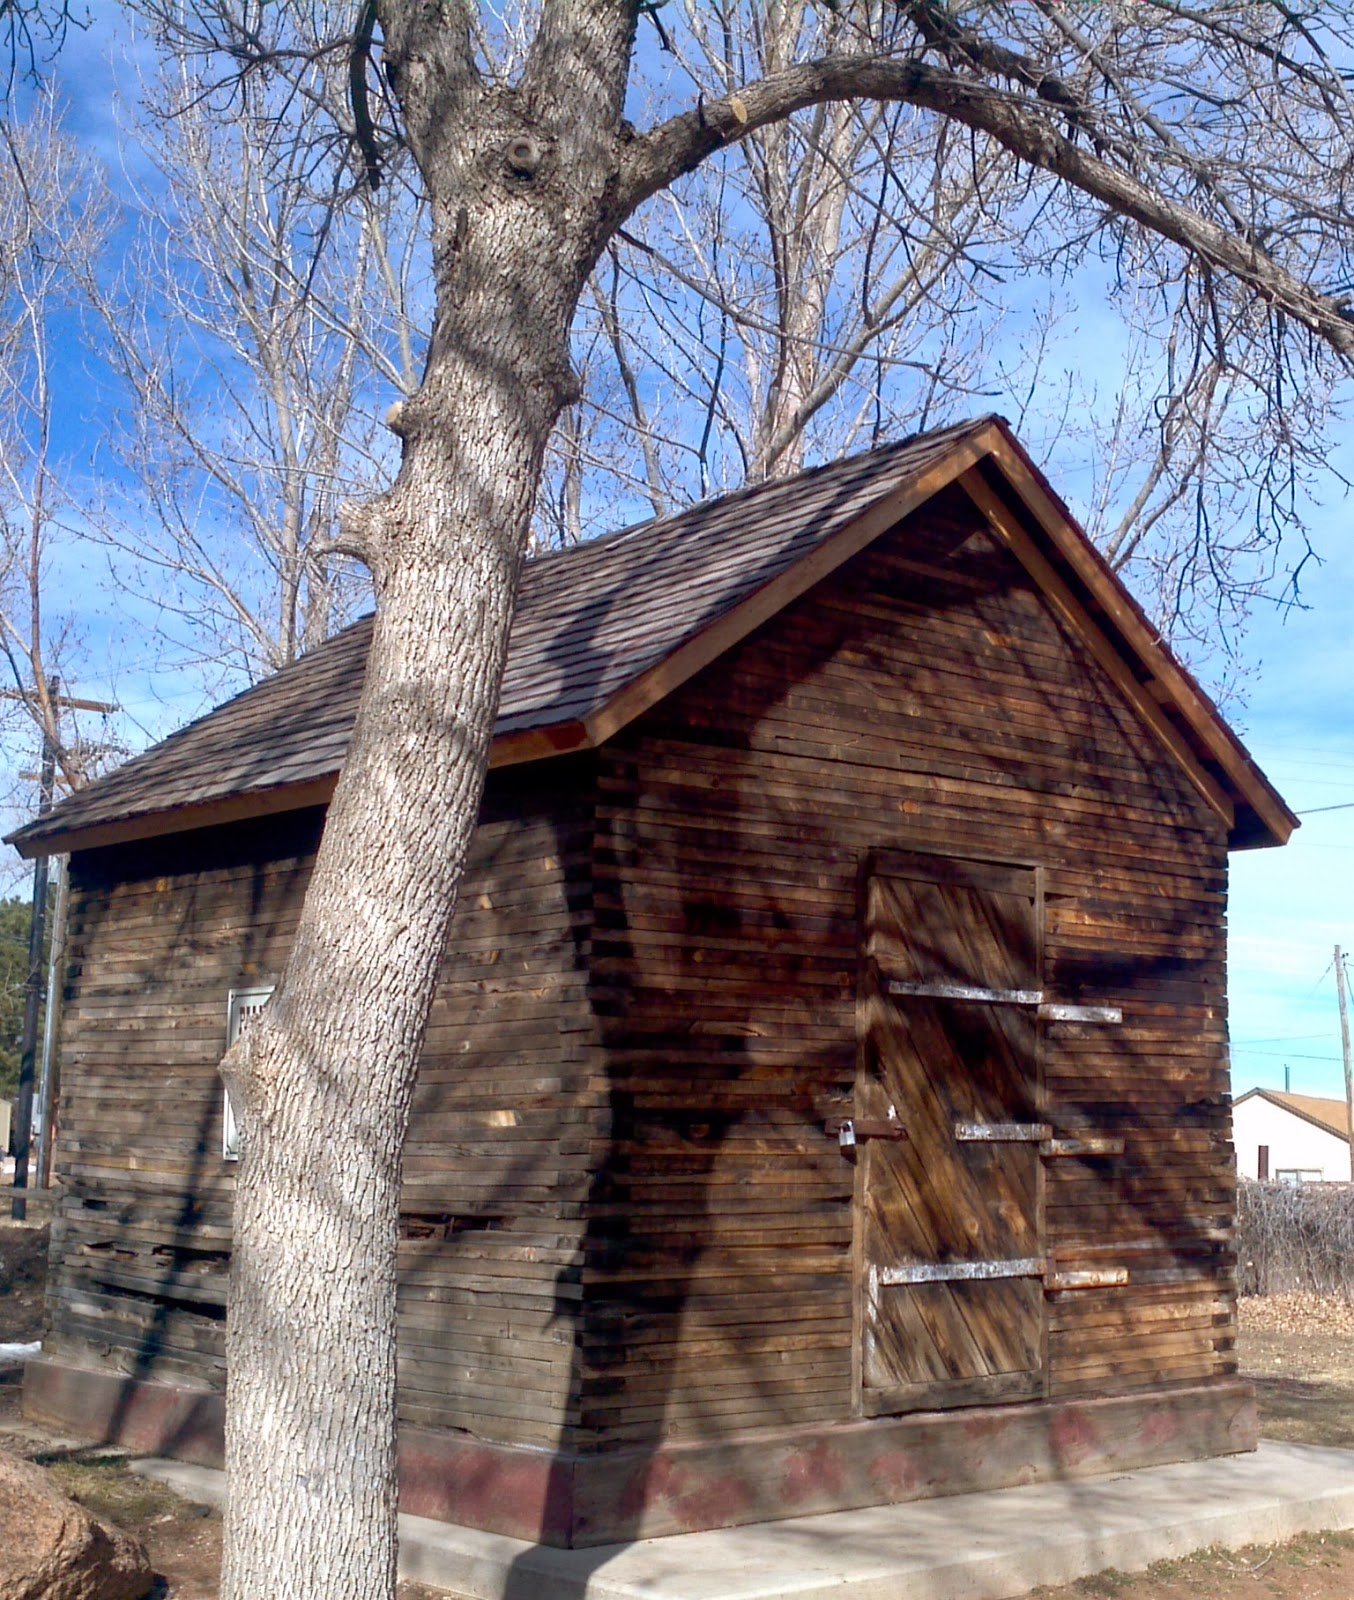
The old town jail,  built in 1890
and restored in 2001
 
Winter trees, with their bare and twisted branches.
There is a special quality about them that we
don't always notice in summer.

The snow covered and frozen lake.
We 'lost' the lake in last summer's drought, we miss it dearly.
The fishing contest has been canceled, and we no longer have
fireworks on the 4th July as it's too dry and dangerous.

But we have a committee of fund raisers and volunteers,
working hard to restore the lake to its former glory.


Wednesday, February 26, 2014

Does it snow in Britain?


"January brings the snow
makes our feet and fingers glow"*
 

I am often asked if we get snow in the UK. It makes me smile.

April asked me the very same question on Monday, and I went to my desk to pull out my map of the world. (I love maps, but that's another post entirely!)
 
We looked at the location of the UK and at the latitude it is on. Did you know that London is at 51.5N while Quebec is at 52N? Glasgow in Scotland sits at 55.8N. Not quite as far north as Juneau in Alaska (52.9N) but it's a good way north.

The UK doesn't get the same bitterly cold weather as they do in Canada and Alaska, but we do get snow. And winters are long and dark and dreary. Once the clocks change, which happens in the UK about a week after the US, it doesn't get light in the mornings until around 8:30 - 9:00am. We go to work in the dark and we come home in the dark because the light starts to go around 3:00pm in the afternoon.

 
However, the summer is long and light. You can sit outside on a summer evening until 10:00pm and the birds are singing and the sun is coming through the window before 4:00am in the morning. And if you hanker for some time sitting in the sun on the island of Malta, just take yourself out to LA and sit on the beach there, the latitudes are so close you could imagine you're sitting in the Mediterranean! 


The photos on this page are of the last snow I 'enjoyed' before leaving the UK and moving to America!

All that talk of snow has made me feel cold, so I'm off to make a cuppa, you coming??

Wendy


*Sara Coleridge

Tuesday, February 25, 2014

"Nesting" Springtime Centerpiece


Hello friends! 

Yesterday morning, it had just hit me that Winter is ending and  I NEEDED wanted a large and dramatic Springtime centerpiece for my dining room table, but at a "this is an unplanned and compulsive buy" price.

I was pushing a shopping cart around my local craft store with my sweet friend Wendy in tow, roaming aisles, waiting for inspiration to bite. Five ideas later, it finally did! We came across a 14 inch super twiggy wreath, very inexpensive, and a birds nest came to mind. A LARGE birds nest. Go big or go home, right? 

Give it a try! ~ April


These are my supplies, cost around $10, items available at any craft store:


  • 1 - Natural wreath, the really "twiggy" variety, 14 inches $2.99

  •  1 - 6 inch greenStyrofoam Disc (located in the floral department) $1.95 *the 6 inch fit the center of my wreath perfectly, but I recommend holding up the wreath at the craft store and eyeballing the center of it against the foam.  You will want a tight fit, you can easily cut the foam,  shaving the sides with an exacto knife.

  • 1 - pkg of preserved sheet moss, approximately 3 oz's $3.20

  • 1 - pkg of plastic blue Robins eggs (or any that you prefer) $1.50 *these eggs were small, about an inch tall a piece, 12 total eggs, but you can use larger eggs or decopauged eggs, less eggs or more, etc 

  • White school craft glue which I already had around the house


Instructions:

Step one:
Simply take your styrofoam disk and press it firmly into the center of the wreath. No glue needed for this step, as the foam should fit tightly into the center. You can cut the foams diameter to fit, if it is too snug. I pressed the foam to where the disk sunk down a bit in the center of the wreath, from the top, giving it a bowl/nest  shape, and elevating the bottom. 

Step Two:
Lay your moss out on your workspace, breaking it into smaller clumps.  Pour craft glue onto a disposable plate. Dabbing the bottom of each piece of moss into glue, fill in the surface of the foam. I did a thin layer in the center, and more towards where the disk met the wreath, for a natural nest shape. Do not try to be perfectly even, nature is lumpy and bumpy. Let this dry completely (a few hours). 

Step Three:
In the center of your new large nest add your decorative eggs, and anything else that you might like to display. I did not use any glue for this part because I wanted to be able to change things up over the years. My 7 year old daughter decided a momma bird needed to be in the nest, so she grabbed the one off of my kitchen window (a big gold one). Not sure I love LOVE it but my daughter's enthusiasm was precious so it stays for now.

Tip: If you are concerned with a bit of shedding from all of the natural components (nature can be  a tad messy) BEFORE step two, you can hot glue a circle of dark brown felt to the bottom of your nest, first cutting the felt to fit the diameter of the wreath.  Hot glue on the outer edge of the felt, a nice even ring, and press (glue side down) all around the wreaths edge covering the wreath bottom and foam disk. Flip the wreath over and continue to step two. Choose a felt color that is close to the color of your wreath

HAPPY SPRING!

April